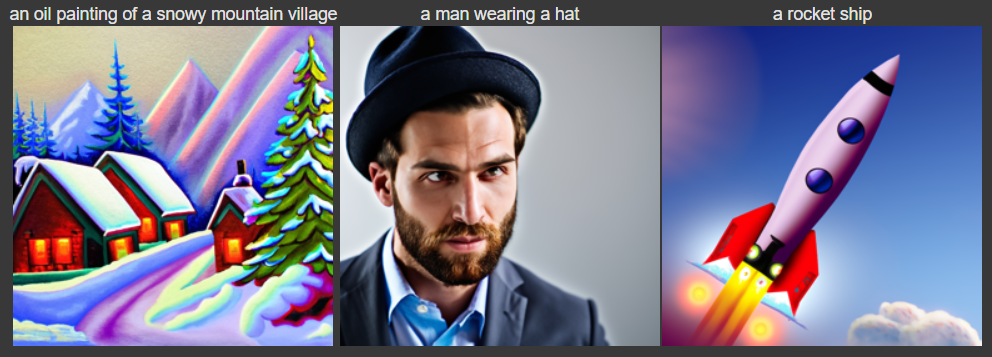
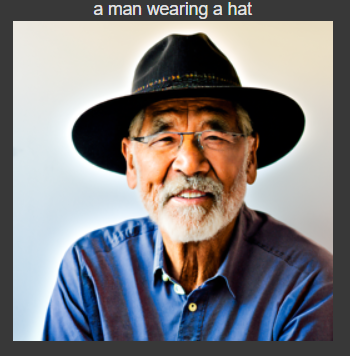
The first part of this project was to simply generate images using the pre-trained diffusion models. We have 2 U-Nets, the stage 1 U-Net is used to sample a 64x64x3 image and the second stage 2 U-Net is used to blow up that image to 256x256x3. I first generated 3 images with the provided prompts using 20 iterations for each the stage 1 UNet and the stage 2 UNet, and the results are shown below.

Next, I tried increasing the number of iterations in both the stage 1 and stage 2 U-Nets and produce another image of the man wearing a hat. I got much more realistic results using more iterations. Also, I am using a seed of 180 for the rest of the parts.
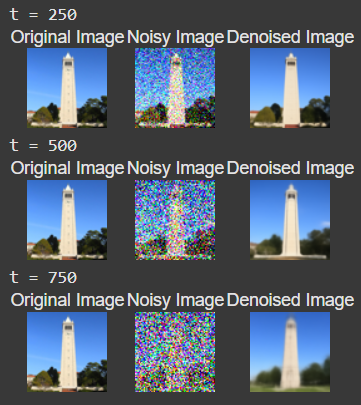
In this part, we are given a test image (a 64x64x3 image of the Campanile) and apply noise to it at different timesteps (lower timestep = closer to original image, higher timestep = closer to pure noise). We use the following formula to get the noised image x_t.

Here are the noising results at t = 250, t = 500, and t = 750.

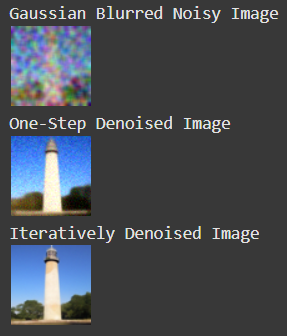
In this part, we attempt to use classical denoising procedures, such as Gaussian blurring, to eliminate the noise from the image. Here, we get very substandard results:

In this part, we use a pre-trained U-Net to predict the noise in an image given the timestep, and then remove the noise in one step to solve for x_0, the original image. To find x_0, we must use the previous equation from above and algebraically solve for x_0 to properly scale the noise estimate and remove it from the input image x_t (the noised image). Here are the results from one-step denoising at t = [250, 500, 750]
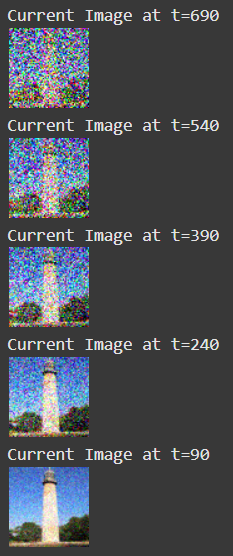
In this part, we want to iteratively denoise towards x_0 rather than doing it in one step. To do this, we start from a noisy image and then use the following formula to get the image at the previous timestep (which will be slightly less noisy):

Here are the results from every 5th loop of denoising (excluding the final result):
Here is the final result, compared to the final results of gaussian blurring and one-step denoising. We can see a noticeable improvement over one-step denoising, the image is much less grainy:
In this part, we run iterative denoising from pure, random noise to generate brand new images. Here are 5 sampled images using "a high quality photo" as the prompt:

In this part, we try to improve on our results from iterative denoising by adding classifier free guidance (CFG), which essentially modifies the noise estimate by making it a linear combination of an unconditional noise estimate, and a prompt-conditioned noise estimate. Here is the formula to compute the CFG noise estimate (where gamma controls the strength of CFG):

Here are 5 CFG-generated images using "a high quality photo" as the prompt.

In this part, we take a real image, add noise to it, and then denoise it. If we start by adding more noise, then the correspondingly denoised image will be very different from the original image. Likewise, if we only slightly add some noise and then denoise that, it will be closer to what the original image looks like. Here are some examples of image-to-image translation with CFG iterative denoising and prompt "a high quality photo":

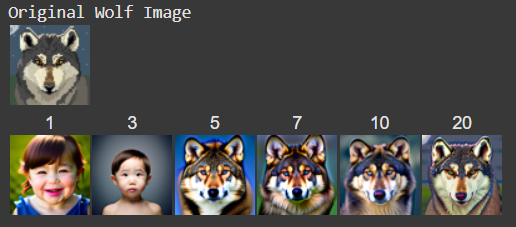
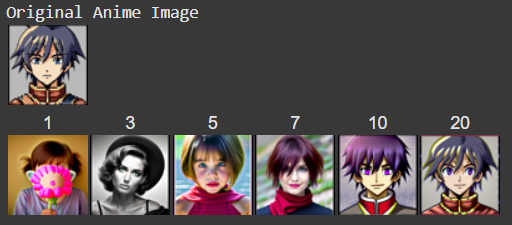
Here, we test the previous part on hand-drawn (non-realistic) images and try to project them onto the manifold of real images. Here are some results from trying this:


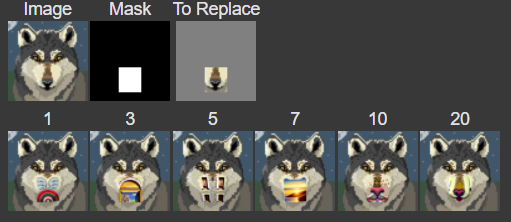
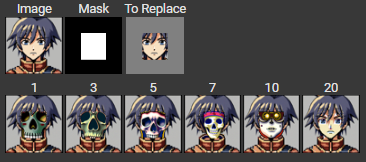
We are pretty much repeating the same procedure, except we are only noising/denoising a patch of the image and keeping the rest of the image as is. For all of my results, I used the prompt "a high quality photo". Here are some results from inpainting:

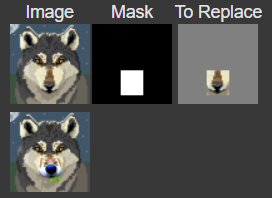
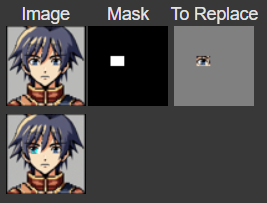
In this part, we are essentially doing the same thing as the previous part, except changing the prompt to something other than "a high quality image".

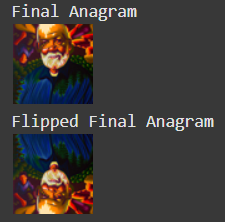
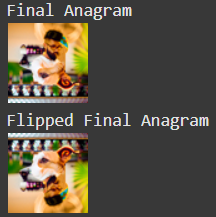
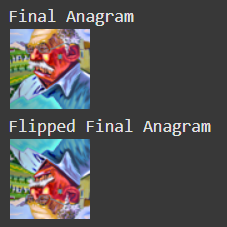
The idea of this part is to create an image that looks like one prompt right-side-up, and a different prompt upside down. To do this, we first calculate the noise estimate for the first prompt on the right-side up image. Then, we calculate the noise estimate for the second prompt on the upside down image. Finally, we flip the second noise estimate and average that with the first noise estimate. This will guide the model to produce an anagram image.
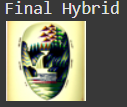
The goal of this part is to create a hybrid image that looks like one prompt from a close distance and another prompt from a far distance (sort of like the hybrid image from project 2). To do this, we calculate the noise estimates for each prompt on the original image, and then take the low-pass frequencies from the first noise estimate and add that to the high-pass frequencies from the second noise estimate. Here are some examples of hybrid images that I created.


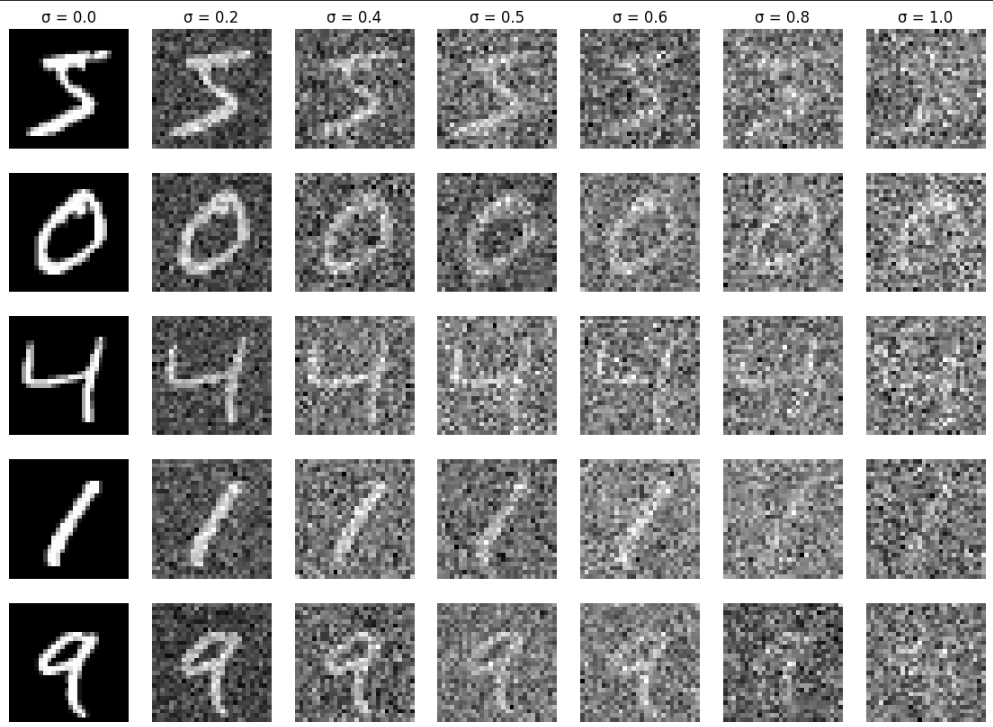
In this part of the project, we are trying to train a U-Net to denoise a noisy MNIST digit. First, in order to create the training dataset, we must add noise to the MNIST images. Here are some examples of varying noise levels:
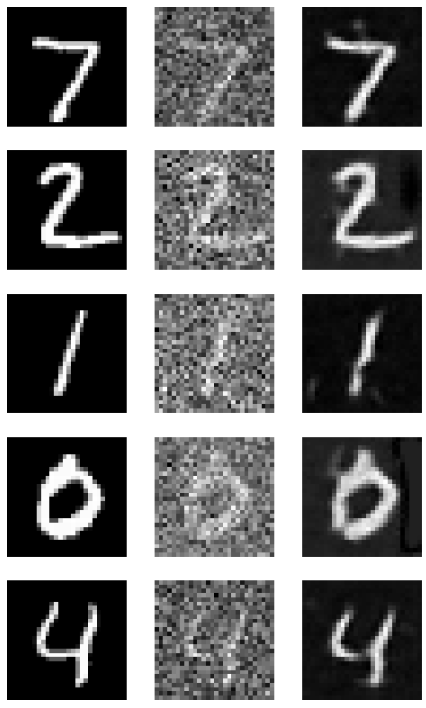
Next, we want to train the U-Net model on (noised_image, original_image) pairs so that it can learn to denoise noisy digits. I chose to use sigma=0.5 for my noise level for all the images in the training set. After 1 epoch, here are some sample results:
Here are the results after 5 epochs of training the U-Net
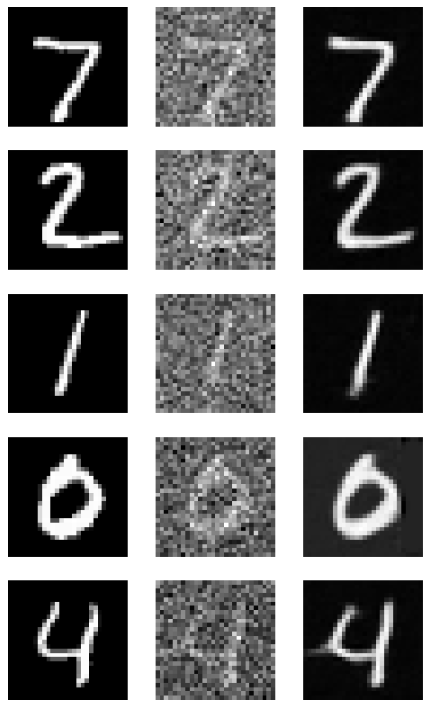
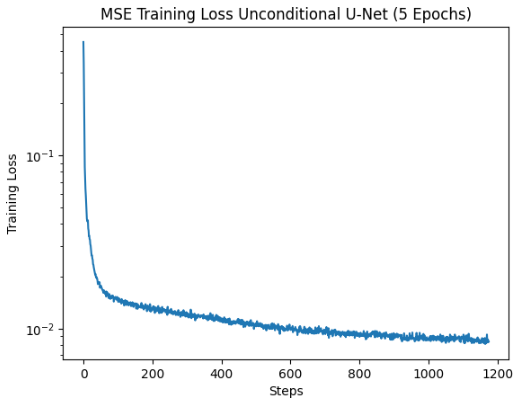
Here are the results of the trained U-Net model on out of distribution images (i.e. images that are noised more than 0.5 and less than 0.5), to test the robustness of the model.

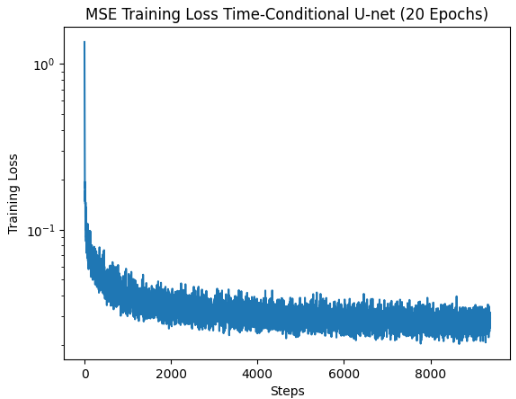
In this part, we want to change our U-Net to predict the noise of an image instead of performing the denoising itself. This is because, as we know from part A, iterative denoising works better than one-step denoising. We also add conditioning on the timestep of the diffusion process to our U-Net, so that the model understands which step we are at in the iterative denoising process.
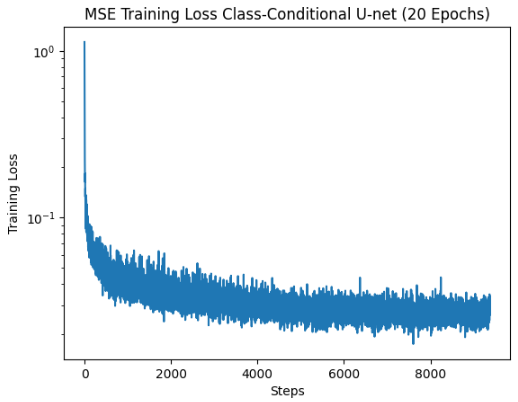
To train the model, we simply take a batch of random images, noise each image with a random timestep value from 0 to 299 using the first equation from part A, (0 being no noise and 299 being pure noise), run the model on that noisy image to get the predicted noise, and then calculate the loss between the predicted noise and actual noise added.
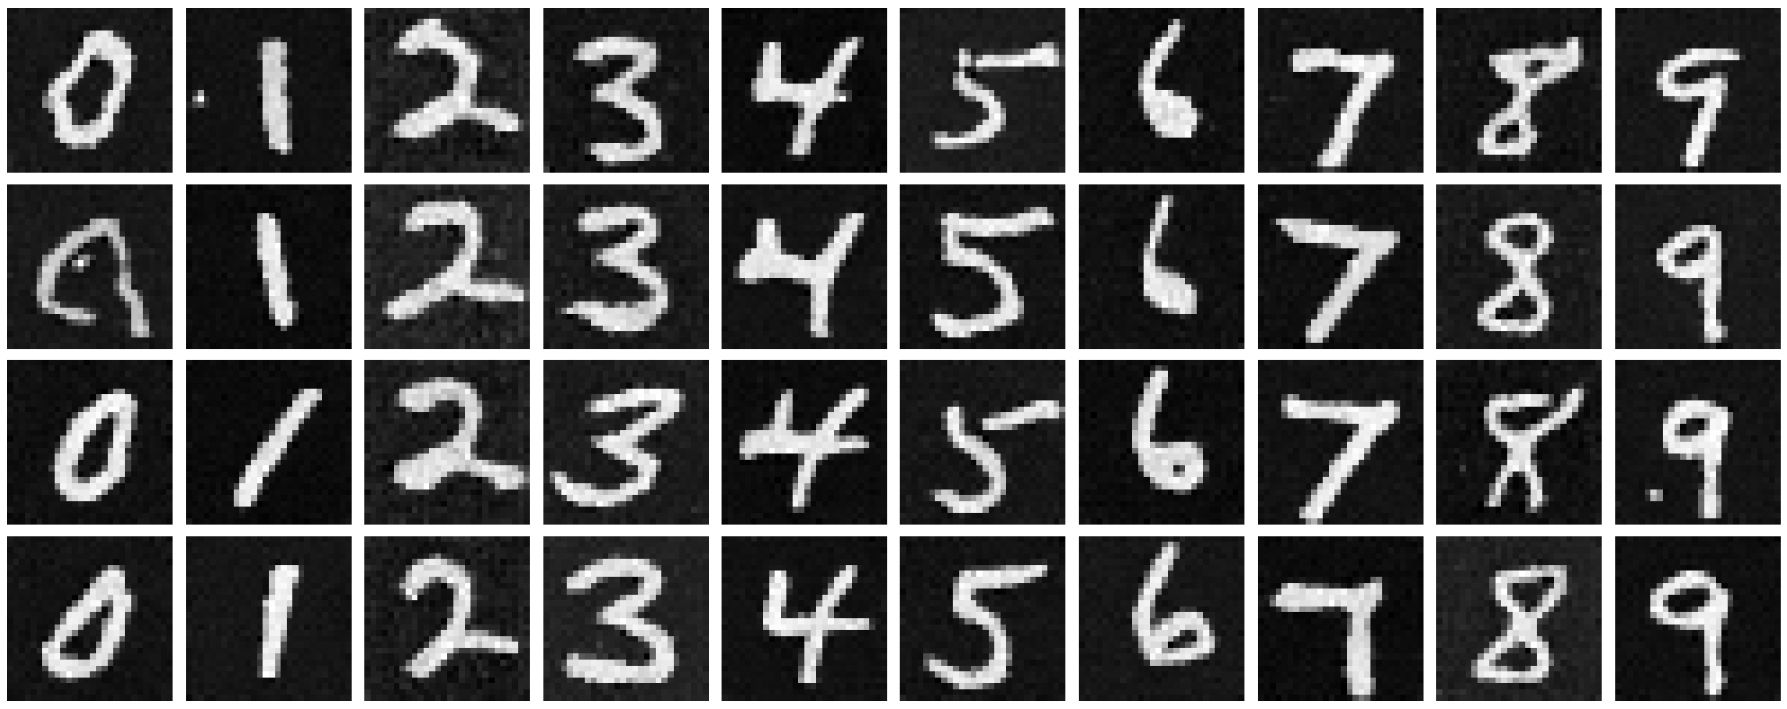
To sample from the model, we simply run the iterative denoising algorithm from part A. We start from an image of pure noise, and then iteratively move towards the clean image. Since the model has been equally trained with all kinds of noise, it should be able to properly denoise the image after sufficient training. Here are some results from my time-conditioned U-Net:
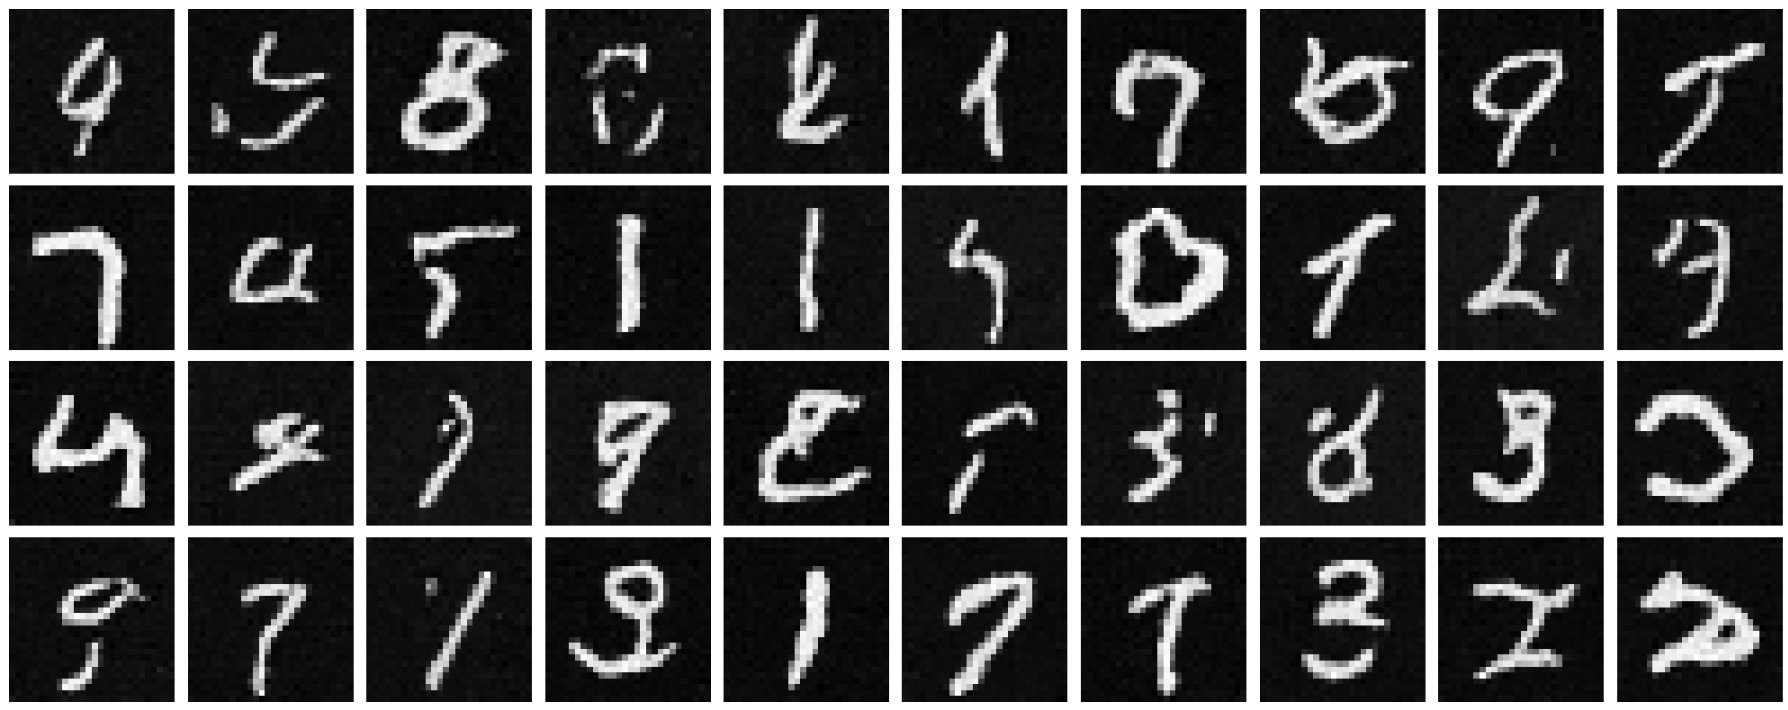
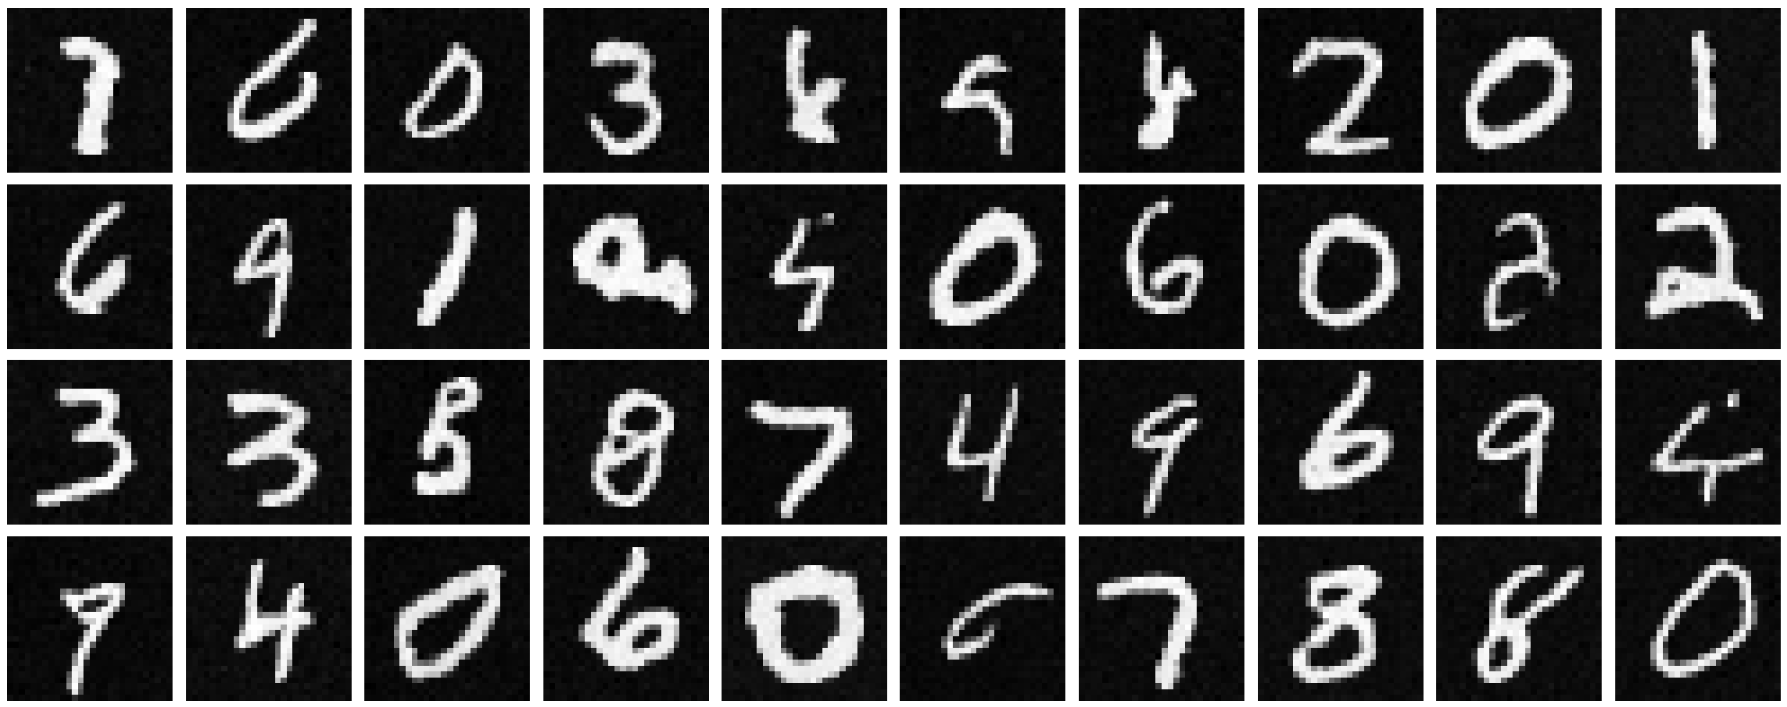
From the previous section, it's easy to see that the model is still struggling to create reasonable digits. This is because the model cannot distinguish between different numbers, and tries to create digits unconditionally, sometimes resulting in amalgamations of digits instead of discrete digits. In this section, we add class-conditioning to our U-Net, which essentially tells the U-Net what specific digit we want to generate.
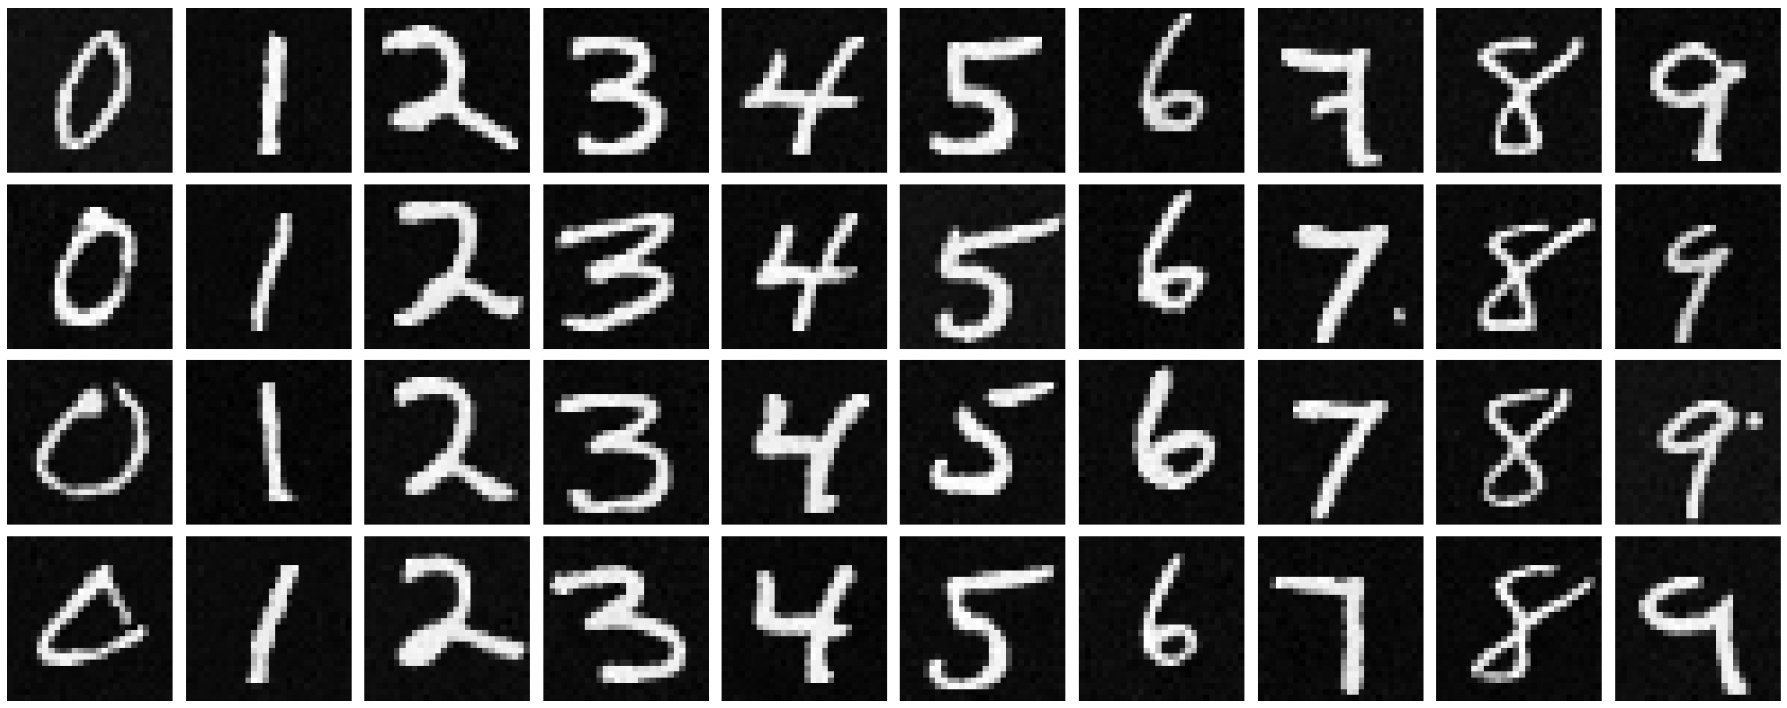
The training algorithm is almost the same, except this time we use the MNIST training data labels as our "class" vector and pass that into the U-Net as well. When sampling from the trained U-Net, we simply pass in the class vector corresponding to the digit we want to generate. Here are some results from training a U-Net conditioned on both class and time.
